+86-15052135118

 Español
 Get In Touch

Content
- 1 Understanding the World of Chipboard Screws
- 2 Five Key Questions to Guide Your Selection
- 3
- 4 Putting It All Together: From Selection to Installation
Understanding the World of Chipboard Screws
When embarking on any woodworking or furniture assembly project, the fastener you choose is not merely a detail—it is a foundational component that determines the structural integrity, appearance, and longevity of your work. Among the myriad of options, chipboard screws stand out as a specialized and highly effective solution for engineered wood products. These screws are meticulously engineered to address the unique properties of materials like particleboard, MDF, and of course, chipboard. Unlike traditional wood screws, they are designed to maximize grip in materials that have a lower density and a more variable internal structure than solid wood. Choosing the wrong screw can lead to a host of problems, including stripped holes, material splitting, weak joints, and ultimately, project failure. Therefore, investing time in understanding the nuances of chipboard screws is an investment in the success and durability of your DIY creations. This guide will serve as a comprehensive resource, moving beyond basic definitions to explore the critical factors that inform a wise selection. We will delve into specific use-case scenarios, such as chipboard screws for kitchen cabinets, and dissect the technical specifications that matter most, ensuring you have the knowledge to confidently navigate the hardware aisle.
Five Key Questions to Guide Your Selection
Before purchasing, ask yourself these questions, each linked to a crucial aspect of chipboard screw performance and aligned with common search queries from fellow DIYers.
What Type of Project Are You Fastening?
The nature of your project dictates the screw's required strength, length, and aesthetic. A bookshelf holding lightweight ornaments has vastly different demands from a bed frame enduring dynamic loads.
Light-Duty vs. Heavy-Duty Applications
For light-duty applications, such as assembling a small display shelf or a simple picture frame, standard chipboard screws with finer threads and smaller gauges may suffice. The focus here is on precision and avoiding material blow-out. In contrast, heavy-duty projects demand a more robust approach. Constructing a workbench, a large wardrobe, or a subfloor requires screws with a thicker shank (higher gauge number), deeper and more aggressive threads, and often, a higher tensile strength. These screws are engineered to handle shear forces and sustained weight without bending or loosening over time. A common pitfall is using a light-duty screw in a heavy-duty application, which may hold initially but will likely fail under stress, compromising safety. For instance, when considering best chipboard screws for subflooring, the primary concerns are pull-out resistance, shear strength, and the ability to withstand the constant pressure and movement from above. A subfloor screw must bite deeply into the joists and hold the paneling firmly flat to prevent squeaks and movement.
What Material Will You Be Screwing Into?
Chipboard screws excel in engineered wood, but "engineered wood" is a broad category. The specific substrate influences your choice.
Chipboard/Particleboard and MDF
Standard chipboard and particleboard have a granular composition. Screws for this material benefit from widely spaced, deep threads that can grab onto the particle clusters effectively. A smooth shank under the head is also advantageous. MDF (Medium-Density Fiberboard), being more homogeneous and dense, requires a slightly different approach. While standard chipboard screws work, screws designed specifically for MDF often have a sharper point and slightly modified thread geometry to compact the fibers cleanly rather than pushing them apart. For both materials, a major consideration is preventing the material from crumbling or "blowing out" at the entry and exit points. This is where features like the screw's point and the use of pilot holes become critical. The goal is to create a strong internal thread within the board without destroying its surface integrity.
Combining Materials: Chipboard to Metal or Solid Wood
A frequent task in cabinet installation or furniture repair is attaching a chipboard panel to a metal bracket or frame. This scenario requires a screw that can tap its own thread into the metal. Here, you would look for a hybrid screw, sometimes called a combination screw. These screws typically have the spaced-out thread pattern of a chipboard screw for the chipboard portion, but the thread design changes near the point to a sharper, finer pitch suitable for cutting into metal. Similarly, when attaching chipboard to solid wood studs or frames, the screw must perform well in both materials. The chipboard portion needs good pull-out resistance, while the portion embedded in the solid wood benefits from a thread that can engage the dense grain without causing splits.
What Are the Critical Technical Specifications?
Understanding screw specifications is non-negotiable for a professional result. Length, gauge, head type, and drive type are the core parameters.
Length and Gauge (Diameter)
The golden rule for screw length is that the screw should penetrate the main load-bearing material (e.g., a stud or the second board in a joint) by at least 1 inch (25mm) for optimal holding power. For example, when screwing a 3/4-inch thick chipboard shelf to a 2-inch thick side panel, the minimum screw length should be 1.75 inches. Gauge refers to the screw shaft's diameter. A higher gauge number indicates a thicker, stronger screw. Common gauges for chipboard screws range from #6 (light duty) to #10 or #12 (heavy duty). Using too thin a screw in a thick material can lead to breakage, while an overly thick screw can split the chipboard.
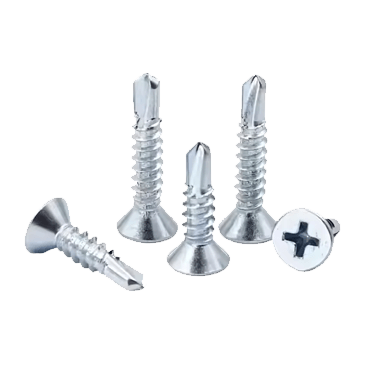
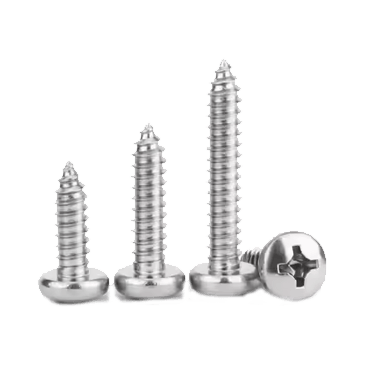
Head Style and Drive Type
The head style is largely determined by the desired finish. Countersunk heads (flat or oval) are ideal for a flush finish where the screw head sits below or level with the surface. Pan head or washer heads are used when the screw head will remain visible or when a wider bearing surface is needed to prevent pull-through. The drive type affects torque transmission and cam-out (slippage). While Phillips is common, it is prone to cam-out under high torque. Pozidriv offers better grip. Square drives (Robertson) and star drives (Torx) provide superior torque transfer and are less likely to strip, making them a preferred choice for high-stress applications and for chipboard screws for high-stress furniture joints. The right drive type ensures you can tighten the screw sufficiently without damaging the drive recess.
To illustrate the interplay between head style and application, consider the following comparison:
For a clean, hidden finish in cabinetry, a countersunk head paired with a Torx drive provides both aesthetics and high torque capability. In contrast, for securing a subfloor where head visibility is irrelevant but preventing pull-through is key, a washer head with a square drive offers a large bearing surface and reliable installation.
| Head Style | Primary Application | Advantage | Consideration |
|---|---|---|---|
| Countersunk (Flat) | Cabinetry, joinery, any flush finish | Provides a smooth, invisible finish | Requires a countersink drill bit for proper seating |
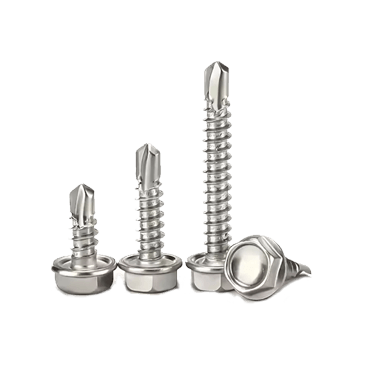
| Washer Head (Pan with integrated washer) | Subflooring, metal-to-wood, thin materials | Wide surface area distributes load, prevents pull-through | Head remains visibly proud of the surface |
| Bugle Head | Drywall to wood studs, similar soft materials | Designed to not tear paper surface | Not typically optimized for chipboard's core grip |
Do You Need Specialized Features?
Beyond basic specs, specialized features solve specific problems and elevate the quality of your work.
Self-Countersinking and Thread Design
Many modern chipboard screws feature a self-countersinking head design. This means the underside of the screw head is shaped to cut into the material as it is driven, creating its own countersink without a separate drilling step. This saves time and ensures a consistent flush finish. Thread design is another advanced feature. Some screws have twin threads (a double-start thread) which allows them to drive in faster with less rotational force. Others have serrations or notches under the head that act as cutting flutes, further aiding in clean countersinking and reducing the risk of top-surface chip-out.
Coatings and Corrosion Resistance
The environment where your project will live dictates the need for corrosion protection. For interior furniture, a basic zinc plating is often sufficient. However, for projects in humid environments like bathrooms, kitchens, or for any outdoor applications, a higher level of protection is mandatory. Screws with weather resistant chipboard screws for outdoor use are coated with materials like zinc yellow, epoxy, or are made from stainless steel. These coatings prevent rust and staining, which can weaken the screw and mar the appearance of your project. Using an unprotected screw in a bathroom vanity, for instance, is a recipe for premature failure and unsightly rust marks.
How Do You Ensure a Professional, Split-Free Result?
The final, critical phase is execution. Proper technique is what transforms a good screw into a rock-solid joint.
The Non-Negotiable Pilot Hole
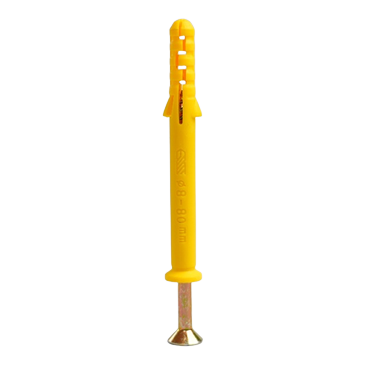
Drilling a pilot hole is the single most important step to prevent chipboard from splitting. The pilot hole should be slightly smaller than the screw's core diameter (the shank without the threads). It guides the screw and removes material to reduce internal stress. For chipboard, a pilot hole is recommended for screws larger than #6 gauge, or whenever you are working near the edge of a board. The depth of the pilot hole should match or slightly exceed the length of the screw's threaded portion that will be embedded in the main piece of material. Skipping this step drastically increases the risk of material failure, especially when driving multiple screws close together.
Drilling Techniques and Tool Settings
Use a sharp drill bit that matches the pilot hole size needed. For a flush finish with a countersunk head, a combination pilot-and-countersink drill bit is an invaluable tool that performs both operations in one step, ensuring perfect alignment. When using a power drill or impact driver, set the clutch to avoid over-driving. Over-tightening a chipboard screw can strip the threads inside the material, rendering the connection useless. The screw should be driven until the head is firmly seated but not so forcefully that it begins to chew up the material around it. For sensitive applications, such as when working with pre-finished boards for chipboard screws for kitchen cabinets, practicing on a scrap piece of the same material is highly advisable to perfect your technique and avoid costly mistakes on the final piece. Furthermore, understanding the chipboard screw size guide for beginners is part of this professional approach; knowing that a #8 x 1-1/4 inch screw is a versatile starting point for many medium-duty tasks can build confidence and ensure proper fastening from the very first hole.
Putting It All Together: From Selection to Installation
Selecting the right chipboard screw is a systematic process that synthesizes all the information discussed. Begin by defining your project's load requirements and material composition. Consult a chipboard screw size guide for beginners to narrow down your initial length and gauge options. Then, consider the environment to determine if corrosion resistance is needed. Choose a head style and drive type that suit both the aesthetics and the practical demands of the installation torque. Finally, commit to the disciplined practice of drilling precise pilot holes and using controlled driving force. By methodically addressing each of these factors—project type, material, specifications, special features, and technique—you move from guesswork to guaranteed success. Whether you're securing a delicate cabinet back panel with fine-threaded screws or driving robust, coated screws for an outdoor planter box, this holistic understanding empowers you to choose not just a screw, but the correct fastening solution. This ensures your DIY projects are not only structurally sound from the start but also remain durable and proud for years to come, standing as a testament to the craftsmanship that informed their creation.